)
Here at Rebased we’ve been invested in remote work for a few years now, while still keeping small offices in three big Polish cities for people who want to work from office, meet their coworkers and have a good coffee from a local roastery. The COVID-19 situation meant working from office was highly discouraged and we all fell back to working from home (or some remote locations away from big cities). In order to have at least a bit of face time with each other, we have introduced daily “online coffee” calls, a half-hour slot every day when anyone can join and have a chat (or just listen).
But talking about how we’re coping, what we read or saw or did in our spare time, eventually gets stale despite our best efforts. Inspired by a recurring quiz on YouTube that I occasionally watch, I cobbled together a quick prototype of Wheel of Fortune game to play during those calls, and then decided to rewrite it properly in Elm, after all the positive feedback.
There is a comprehensive readme on the project’s GitHub page, detailing how to set it up with your video call platform of choice. Let’s have a quick look at how I set it up on my Linux machine, with OBS and Jitsi as the videocall platform.
OBS
OBS, or Open Broadcaster Studio, is an excellent open-source program for video recording and especially live streaming. Install it from your package manager, where it may be named obs-studio.
Running it for the first time pops up the auto-configuration wizard. Either dismiss it, or configure OBS for streaming, using whatever settings it detects, as they won’t really be relevant. Afterwards, go into Settings/Video and set Output Resolution to no higher than 1280x720, and a 16:9 aspect ratio, for best compatibility with video call software. Now, return to the main interface, you will see something similar to this. The panel layout is configurable, and I’ve reorganized it for presentation here, but your window will be very similar.

Setting up the scene
Start by launching Wheel of Fortune in a browser of your choice, in a separate window so you don’t switch tabs mistakenly. Enable Developer Tools, and undock them into a separate window, so your players can’t see you setting a new puzzle. This problem can also be worked around through OBS scene switching, but having DevTools be its own window is foolproof. I’m using Firefox, and the screen below doesn’t have a top tab bar because I use vertical tabs, hidden when there is only a single tab open.

The hideous magenta background is there for a reason, and we’ll get rid of it in a while.
Return to OBS, click the plus button in the Sources panel, select Window Capture. The exact name of that source depends on your OS. In the dialog that follows, give the source a name and click OK. The next window will allow you to select a specific window and set up basic cropping. Choose your dedicated browser window, crop out the UI then confirm with OK. Your scene should look something like this:

The red frames indicate that this scene element is movable and resizable. You can scale and reposition it now. To quickly scale it to fill the screen, click it and press Ctrl-F.
Less pink, please
Next, right click either the scene element, or its name in the Sources window, and select Filters. In the new window, click Plus, and select Chroma Key. Accept the default name, and you’ll see the effect control sliders. Change Key Color Type to Magenta, then move the Similarity dial back so that the colors are correct and there is minimal color bleeding. A value of 200 seems to work for me. You may also want to change Smoothness to 1. After closing the window, you’ll see the game interface on a black background.
Now it’s too black
Launch your favourite browser and find yourself a nice background image. Download it, return to OBS and add an Image source with your new picture. By default it will be added as the top layer, obscuring the interface, so rearrange the source list by dragging, or selecting scene elements and using the up and down caret buttons. You want the image at the bottom of the list. Here I’ve chosen a freely usable photo of the Walt Disney Concert Hall in LA, from Unsplash. Additionally, I locked both sources using the padlock icon, so that accidentally moving them is no longer possible.

Your face on it
There’s one thing still missing, and it’s the host’s (so your) video feed. In the sources panel, add a Video Capture source, and select your webcam. Reorder and position the image somewhere it doesn’t obscure anything, and add a Crop filter on it, to only show yourself and as little of the surroundings as possible. The next image shows me, hiding behind a Krtek plushie, positioned in a corner and behind the wheel graphics.

Hiding the background
Notice that there is a green background behind me in the above screenshot. This is a €15 green screen, which you can easily buy from photography equipment vendors. OBS by itself does not offer any option to remove a static background, so this is the only choice. By applying another Chroma Key filter on that, I can remove the green background and integrate myself into the image.

Notice some discoloration on the plushie’s hat, this is due to the lighting in my room being uneven (unlike a real photo studio) and the chroma key filter suffering for it.
This completes the scene setup instructions, let’s move to the streaming part.
Streaming?
This is not exactly streaming, but very close. If we were setting this up to be broadcast on any of the popular streaming platforms, we could now just add the server info and click Start Streaming. However, we’ll be working with video chats, which have slightly different goals and constraints. We’ll discuss only Jitsi, but all of them are similar, each with their own quirks and restrictions.
One thing we now don’t have (because it’s been taken over by OBS) is a camera that we can present on the videocall. Enter: virtual cameras.
Virtual Cameras
A virtual camera is a piece of software usable by other applications just like a real webcam, but takes its video input from another source. Continuing with Linux, we need two pieces: one is the OBS v4l2sink plugin. Either install it from your package manager or compile it manually (which is way out of scope here). The second piece is the Linux kernel v4l2-loopback module, also likely available from your package manager. Load the module first, ensure you can use the newly created device (by adding yourself to a video group or setting permission bits. Again, way out of scope here). Install the plugin, restart OBS, and use the new option under Tools to start feeding your virtual camera.
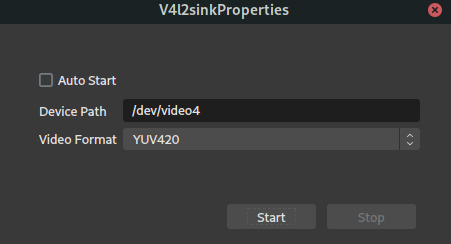
The device path must match what the module created, and the video format should not matter. Click Start to make your virtual camera film the scene as setup in OBS.
Older versions of v4l2sink used to crash OBS on clicking Stop, but this seems to no longer be the case as of May 2020.
Jitsi
On Linux I use the Jitsi Meet Electron app. If you don’t want the app, using the browser version is also acceptable. Jitsi has no special requirements and is available for all three major operating systems in use today.
Launch it, and join or start a room. If you don’t have your own Jitsi Videobridge or Workbase Server instance, just use the freely available meet.jit.si server. Your video feed should automatically pick the only available camera on your system, which is the virtual cam we set up. If not, use the dropdown attached to the Camera button to find and enable it.

Don’t worry if the preview picture appears cropped, like here - other participants should see it in full. But some videocall programs crop the video, as they are optimized for the case of a single face somewhere in the center.
Now, enable your microphone, and interact with the browser and DevTools windows to control the game! Invite people, use console commands to add them to the player list and to set a puzzle, and start playing!
Gameplay
Rules and keybindings are described in detail on the project page. But a quick recap: Enter to spin, any letter to reveal it (if present) on a player’s turn, Space to move to the next player manually.
The first time I presented this on the morning coffee call, there were a lot of surprised faces. Given that Rebased is 90% programmers, all of them experienced senior-levels, with every one of them able to implement this on their own, that was really something! The version we played that day was not as polished as the one available on GitHub, being a quick JavaScript prototype cobbled over the weekend – which I did not want to release due to its very poor quality. A later rewrite in Elm gave rise to the currently published version.
The project is still a bit rough around the edges, could use some work and more extensive testing. So go ahead, set it up, have fun, let us know in GitHub issues when it breaks or what you’d like to see added. And give us a shout on twitter.com/rebased if you set it up and played with your team!